


What This Exterior Door Installation Guide Covers
A poorly installed exterior door in Central Indiana isn’t just an eyesore-it’s a source of drafts, water damage, sky-high energy bills, and compromised security. With freeze-thaw cycles, driving rain, and summer heat swings, every gap and missed flashing detail invites trouble.
This guide walks you through a complete exterior door installation on a typical 36-inch entry door in a wood-framed house, from receiving the door unit to final caulk and trim. You’ll encounter key concepts like rough opening, sill pan, hinge side shimming, head flashing, corner pads, and jamb screws-each one tied to smooth operation and long-term performance. Custom Exteriors has been installing exterior doors around Greenfield and Indianapolis since 1981, and these tips come from real jobsite experience. DIYers can use this as a step-by-step checklist; homeowners who prefer a pro can skip to the “Why Choose Custom Exteriors” section below.
Table of Contents
- Receive and Inspect Your New Exterior Door Unit
- Remove the Old Exterior Door and Prepare the Rough Opening
- Install the Sill Pan and Flashing for Long-Term Water Protection
- Set the New Door Unit: Plumb, Shim, and Secure
- Weatherproof, Insulate, and Finish the Exterior Door Opening
- Check Door Operation and Install Hardware
- FAQs About Exterior Door Installation
- Why Choose Custom Exteriors
- Ready for a New Exterior Door?
Receive and Inspect Your New Exterior Door Unit
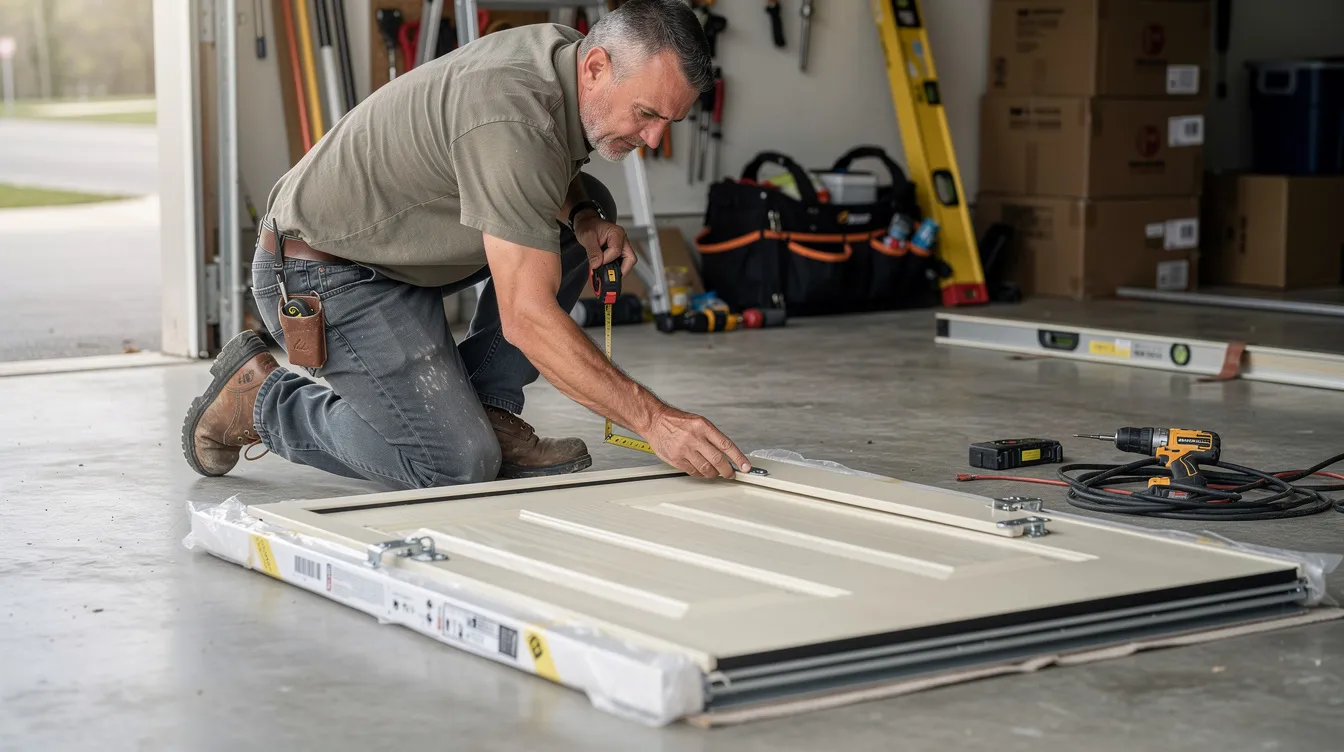
Problems caught at delivery are far easier to fix than issues discovered mid-install. Before tearing anything out, confirm the following against your invoice:
- Width (e.g., 36 inch), height (e.g., 80 inch), jamb depth (4-9/16″ vs. 6-9/16″), swing direction, color, and glass options
- Remove shipping clips and corner protectors carefully to avoid bending brickmold or scratching the slab
- Inspect for freight damage: dents, cracked glass, warped jambs, or a twisted threshold-contact the supplier immediately if anything is off
Many manufacturers require inspection within 3–4 days of delivery to keep the warranty valid. Choosing an exterior door involves balancing curb appeal and security, and common exterior door materials include fiberglass, steel, and wood-each with trade-offs in maintenance and durability. Always measure the rough opening width, height, and jamb depth before buying so the unit actually fits.
Remove the Old Exterior Door and Prepare the Rough Opening
Exterior door removal is a two-person job. Wear gloves and eye protection, especially around glass lites.
- Pull hinge pins or unscrew hinges from the hinge side jamb and set the slab aside safely.
- Remove the existing jamb and threshold using a pry bar and an oscillating or reciprocating saw to cut fasteners between the jamb and framing.
- Pull old shims, nails, and caulk. Sweep or vacuum the entire rough opening and subfloor area.
A tape measure is essential for measuring the rough opening. Measure the rough opening height and width at three points (top, middle, bottom for width; both sides for height). Ensure the rough opening is level and plumb before installation-use a framing square to check corners. Inspect the rough opening for debris and structural integrity, paying close attention to bottom corners and under the threshold for rot or insect damage. Regular inspection of the rough opening for rot improves installation quality significantly. If you find severe damage or an opening that’s badly out of square, it’s time to call a professional.
Install the Sill Pan and Flashing for Long-Term Water Protection
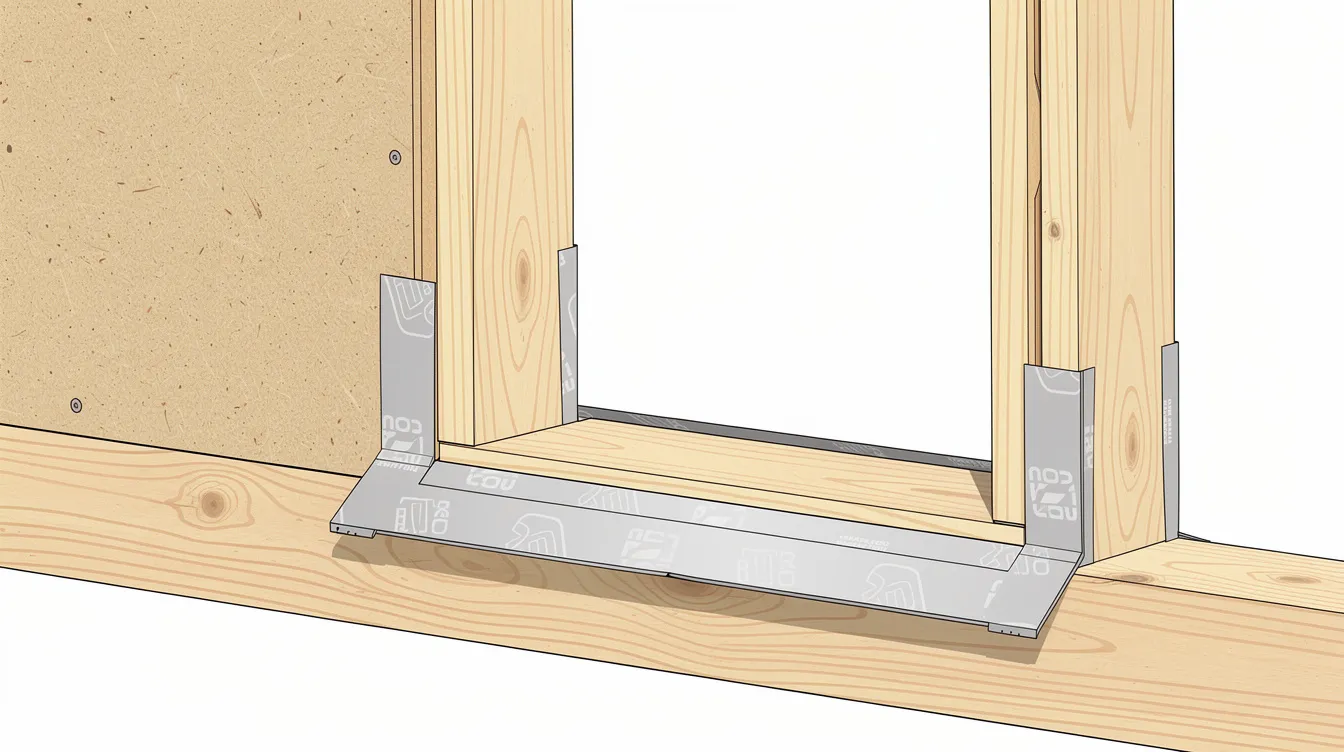
In Indiana’s freeze-thaw climate, a sill pan protects against water infiltration under the door by redirecting any moisture that sneaks past the threshold. Exterior doors must resist rain and air leaks for effective performance, and this step is where that defense begins.
- Level the subfloor under the threshold area. Add shims or self-leveling compound if one side is low.
- Cut back the WRB: trim the bottom flush, leave sides exposing sheathing, and cut a flap at the head that you tape up temporarily.
- Dry-fit the sill pan, then run continuous beads of sealant on the subfloor and along the inside face of the sheathing. For multi-piece rigid pan kits, join sections with PVC cement-press firmly to avoid voids.
- Seal the backdam and seams with compatible sealant, smoothing with a putty knife for full coverage.
Note that a rigid sill pan reduces the opening by about 1/8 inch on each side, so account for that in your measurements. Install side flashing tape over the upturned legs of the sill pan, then add head flashing that extends slightly beyond the side flashing on each edge. Use tapes and sealants rated for your home’s WRB system. After installation, test the threshold for water entry to verify everything drains correctly.
Set the New Door Unit: Plumb, Shim, and Secure the Hinge and Latch Sides
This is the most critical step for smooth operation. If the door isn’t plumb, no amount of hardware tweaking will fix a bind or a gap.
With a helper, tilt the bottom of the door unit into the rough opening, rest the threshold on the sill pan, then swing the top into place while centering left to right. Remove shipping blocks so you can open and close the door gently while adjusting.
Hinge side first:
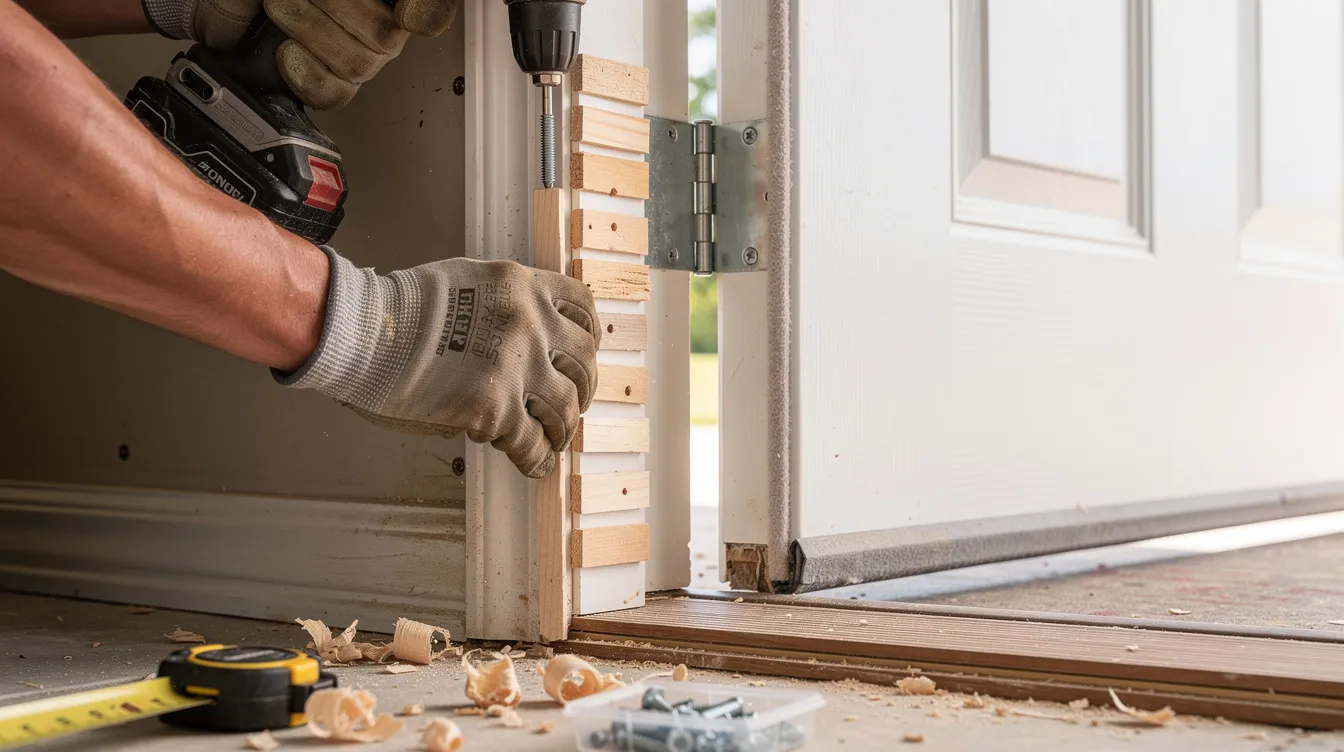
- Place shims behind each hinge location and at the top and bottom of the hinge side jamb. Install shims to prevent the jamb from twisting. A 4-foot level ensures the door frame is plumb-check both directions.
- Predrill three 1/8-inch holes on each side jamb at hinge locations. Drive #10 jamb screws (2.5-inch trim screws work well) that penetrate the stud framing, not just the jamb. Screw heads should be slightly countersunk so you can cover them later with filler.
Latch side next:
- Use shims to fill gaps and prevent jamb twisting during installation at lock locations and midpoints. Secure the lockset jamb with 2.5-inch trim screws. Check that the reveal between the door and jamb is even from top to bottom, and confirm weatherstripping makes consistent contact with the slab.
- Check the door’s plumb in both directions after securing. Avoid fastening through the head jamb into framing-allow slight settling space in wood-framed houses.
Weatherproof, Insulate, and Finish the Exterior Door Opening
Central Indiana’s driven rain, wind, and temperature swings make careful sealing as important as the carpentry itself.
- Adjust the sill: raise or lower an adjustable threshold until a dollar bill drags but still pulls free along the entire length of the sill. Trim weatherstripping ends if they bunch at the sill, and install wedge pads at the bottom of the door frame (corner pads) to prevent water wicking.
- Insulate: fill gaps between the frame and rough opening with low-expansion foam. Use low-expanding spray foam to insulate behind door jambs in small passes-overfilling can bow the jamb and ruin your careful shimming.
- Caulk the exterior side: a caulking gun is needed for sealing around the door. Run a continuous bead where brickmold meets siding, where the sill meets the jambs, and at all trim joints. Weatherproofing includes applying caulk around the door’s exterior at every seam. Install exterior weatherstripping to significantly reduce drafts, and verify that weatherstripping compresses evenly along the door’s entire length.
- Finish up: install or verify rigid head flashing above the exterior trim, fold the WRB flap back down over it and tape seams. Score and snap shims flush with a putty knife, install interior casing, and paint or stain primed surfaces within the manufacturer’s recommended window. Steel doors provide maximum security but can dent and corrode, so keep their finish coated.
Check Door Operation and Install Hardware for Security and Smooth Use
Final adjustments now prevent frustration later. Check that the door swings freely for proper installation-open and close it several times, verifying it doesn’t swing on its own, rub the threshold, or bind along the head jamb. Adjust hinge-side jamb screws slightly to fine-tune the reveal and weatherstrip compression. Reinforce the top hinge with longer screws driven into the framing to prevent sagging over time.
To install hardware, follow the lockset manufacturer’s template: locate and drill the latch and deadbolt holes, align strike plates so the door latches without slamming, and confirm that all screw heads sit flush without interfering with weatherstripping. Run a final checklist-deadbolt throws fully, sill adjustment is consistent across the full width, and no daylight or air leaks through anywhere on the door closed.
FAQs About Exterior Door Installation
How big should my rough opening be for a new exterior door?
The rough opening is typically about 1/2 to 3/4 inch wider and taller than the door unit. A rigid sill pan can reduce available space by roughly 1/8 inch on each side, so plan accordingly. Always check the specific manufacturer’s recommended rough opening for your unit.
Do I really need a sill pan under my exterior door?
Current best practice-and many manufacturer warranties-expect a sill pan. In Indiana’s wind-driven storms, a sill pan is inexpensive insurance against subfloor rot and mold, redirecting any water infiltration safely to the exterior.
What tools and materials are essential for exterior door installation?
Core items include a tape measure, 4-foot and 6-foot levels, drill with a countersink bit, oscillating saw, shims, 2.5-inch trim screws, low-expansion foam, a caulking gun, exterior caulk and sealant, a hammer, flashing tape, and safety gear. Specialty items like rigid sill pans, corner pads, and head flashing kits are often supplied by the door manufacturer.
How long does a professional exterior door installation usually take?
A straightforward replacement typically takes a professional crew 4 to 8 hours, covering removal, minor framing repairs, sill pan installation, weatherproofing, and trim. Significant rot repair or custom trim can extend the project to a complete day or more.
Can I install an exterior door myself, or should I hire a contractor?
An experienced DIYer with carpentry skills can handle a basic replacement, but precision matters-small errors in plumb or flashing create leaks and poor operation. Professional installation is advisable for complex or compromised openings, structural repairs, or when you want a warranty-backed, code-compliant result.
How do I know if my existing exterior door needs to be replaced?
Look for drafts that persist after weatherstripping replacement, visible light around the slab, rot at the threshold or jambs, difficulty latching, or sagging on the hinge side. High energy bills, condensation between glass panes, or a visibly warped slab are also strong indicators. If tearing out the old unit reveals hidden damage, address framing before proceeding.
Why Choose Custom Exteriors for Exterior Door Installation in Central Indiana
Custom Exteriors has been a Greenfield-based remodeler serving Hancock, Marion, and surrounding counties since 1981. Our crews follow proper sill pan and flashing practices, careful hinge-side shimming, and meticulous head flashing and corner pad installation for long-term weather protection. We offer free, no-pressure estimates with clear explanations of door options, energy performance, and scheduling that respects your time.
We can coordinate related exterior work-siding, decks, covered porches, or storm doors-so your entry upgrade matches the rest of your house. Our Custom Interiors division can also tie an upgraded entry door into broader projects like foyer refreshes or trim upgrades. Every job uses manufacturer-approved materials, proper fasteners, and compatible sealants, backed by our workmanship guarantee and clean job sites. Leave your comments or questions when you reach out-we’re happy to help.
Ready for a New Exterior Door? Schedule Your Installation
A properly installed exterior door improves comfort, security, curb appeal, and energy efficiency for years. Homeowners in Greenfield, Indianapolis, and nearby Central Indiana communities can contact Custom Exteriors for a free, no-obligation estimate on exterior door replacement or larger exterior remodeling projects.
Call our office or fill out the contact form on our website-ask about specific brands, styles, or hardware you’re considering. Have your basic measurements and photos of the existing door ready, note any drafts or operation issues, and let us know your preferred timing. We handle everything from accurate rough opening assessment to the final caulk line, so you get a weather-tight exterior door that operates smoothly from day one.